When I was little, I saved my bike for the summer so I can enjoy the holiday. One particular summer, when I threw the garage doors open, I saw my pretty pink Barbie bike with two flat tires.
For goodness sake, how does it keep happening, I fumed, I just pumped those yesterday. My friends went off without me, the first day of summer was partly ruined, and I didn’t enjoy my bike.
Have you ever got your bike out for a ride and saw that one again the tires are flat? Good. We are in the same shoes and I am here to help.
Table of Contents
What do I do when my tires go flat overnight?
All right, all your hoity-toity fancy-dancy never-done-a-chore-in-my-life people, today I shall teach you how to change a flat bicycle tire. You will need it. Now let’s begin.
- Step 1: Identify the problem
- Step 2: Remove the wheel
- Step 3: Check whether the tire is tubeless or tubed
- Step 4: Inspect things thoroughly
- Step 5: Patch up
- Step 6: Install your patched/new tube
- Step 7: Onate your tire
- Step 8: Install your wheel
There are a few things you will need whether your bicycle is tubed or tubeless. Here is a list:
- Mini pump with a hose
- CO2 cartridges (at least two)
- Inner tube
- Tire levers
- Tube patch kit
- Tubeless tire repair kit
Now to begin:
Step 1: Identify the problem
Some problems are not that bad, like the tire moving slightly out of place. You can easily adjust that. You don’t have to remove the entire wheel only to put it back in the right position for nothing.
When you are doing this, move away from the road, traffic, and likely dangers. If you are in the woods, keep a vigilant eye out.
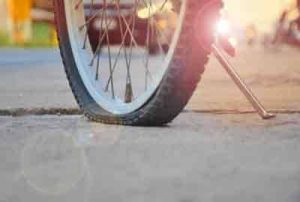
Step 2: Remove the wheel
Sounds too obvious, there has to be a catch. Just pay attention. Flip your bike upside-down, it is easier to work with that way. If your bike is tubeless you have an advantage.
If the problem is a simple puncture, you can get your repair kit out and plug it without taking the wheel off.
Done! If the problem is more than the plug can handle, then you will have to take off the wheel.
First, you have to shift the bike using the pedal to the smallest sprocket so that you can create a chain slack making it easy to remove the wheel.
You can use your feet or hands on the pedal till you get to the smallest chainring. You will have to do this because both the front and back of both tires have issues.
Then to the brakes. Normally if your tire is flat enough it should come off without you touching the brakes but if not, you will have to open the brakes.
This is made easy now because of the quick release system that holds the wheel. On some bikes it is like a lever, some like a button, some you will have to loosen the knots to get the wheel off.
If you have disengaged the brakes and loosened the knots gently lift the bike by the saddle and let the wheel fall. If it doesn’t fall on its own, hit it a bit with your palm.
Now you have removed the wheel.
Step 3: Check whether tire is tubeless
Most tires have a tube on the inside where or an inner tube that you fill with air. The tubeless tires don’t have this inner tube but an airtight rim.
For tubeless tires, you just need your tire plug to patch the puncture. You should find one in your tube patch kit.
You will have no other equipment or tools. Just apply like a band-aid. Ensure it covers the puncture and it is well placed.
For tube tires, you will have to take out that tube that has the main tire in it with a tire leveler.
Place the flat end of one under the tire bead to hold the tire out and move the other round so you can get the tire out. Done!
Step 4: Inspect it thoroughly
If you already used a tire plug for your tubeless tire, inspect it for fir further damage. Try to assess the cause of the damage.
For the tubed tire, you can use your finger to go round ensuring that whatever the problem is you find by feel. If it is a puncture, assess the cause.
Likely, the object that punctured your tubed tire may still be in there somewhere. If you don’t want to use that tube anymore and you have a new one go for it.
Step 5: Patch up
If you don’t have a new tube or you are not ready to use it, you can just patch the tube with your tube kit. First, try to clean the affected area before applying the tube patch.
Tube patches can come with or without glue. A good inspection should tell you which to apply. Make sure you apply pressure so it stays firmly in place.
If your tube is damaged beyond patching, you will need a new one.
Step 6: Install your patched/new tube
Now you have to replace the tube. Here’s what you do: inflate the tube just to point that it has a form. This makes it easy to install.
Using your hand can result in a pinch flat and you risk another puncture using levers. Put the tube on the rim starting for the valve stem and insert straight through.
If you find this difficult, try rolling the bead away from yourself using your hands while carefully placing the tire on the rim.
Allow the sides of the tire beads into the rim and push the tube into your tire. This should be done gently so that tube can be placed properly without any disruptions.
Make sure no sides if the tube is twisted, unaligned, or unbalanced. All this will increase the chances of an even worse puncture.
Step 7: Onate your tire
If you have done very well up to this point, inflating the tire, tubed or tubeless, should be a breeze.
Here you can use either a mini pump or a CO2 cartridge. They are both good. The CO2 cartridge is good for higher pressure.
The only downside is that it can only be used once so I will go for the mini pump.
The mini pump is good and a pump with a hose is the best because of the leverage you will have when it is on the ground.
Another advantage is that you can use a mini pump for as long as a lifetime. As you pump, keep checking and ensure the tube is well placed on the rim.
Step 8: Install your wheel
Finally done, all you have to do is replace which is a reverse order of step 2, removing the wheel.
Now bikes come in different makes so be sure that the way you remove the wheel you replace it. Don’t skip any steps.
Make sure the axle is well inside the fork, the brake is re-engaged, and that everything works perfectly. Try the brakes and the wheel before you continue on your way.
Why does my bike tire keep going flat overnight?
Let’s start with this very important question first. I mean it’s not like someone is sneaking into my garage and deflating the tires night after night (or are they?) What could be the problem?
Here are a few reasons:
- Your tire has been punctured
- Bad valve stem
- Your tire is worn
- Your tire is slightly out of place
- The tires are over-pumped
Your tire has been punctured
This is one of the commonest reasons for a flat tire. You may have ridden over a glass or sharp stones and twigs, maybe even a nail. They may be a hole in the tire and it will affect you.
If for example, you ride over a rough part of the road may be somewhere there is construction going on or a lot of debris your tire will be punctured.
How quickly you will notice depends on how big and the hole is. It will deflate faster if it is a big hole compared to a small hole that may take up to an hour.
To avoid this try to stay on the road and avoid debris or dirt. Your bike tricks can get you a puncture and we don’t want that happening.
Bad valve stem
Okay if you got a bike when you were a kid, you just cared about riding the bike and making sure it looked great.
The parts of the bike were the least of your concern. Especially not the valve stem. Well, it should. The valve stem is this tiny thing on the tire where the air goes. It is very important.
You see when you want to inflate a tire you open up the valve stem and the air goes through it. After that, you seal it.
If the valve stem is not good, all the air will leak so you will wake up to a flat tire. If yours is not bad, it will retain a bit of air but with time it will leak to make you inflate your tire very regularly.
Sometimes it is not that the valve is spoilt or damaged. It may be that the valve is clogged with dirt so it won’t close properly. It will make the air leak.
Your tire is worn
Just like clothes, shoes, and car tires, the tires of your bike can also wear out.
Over the years, with a lot of use, riding up and down so many streets, doing so many streets, some parts of the tire can wear unevenly to the other parts, way too many punctures can affect the tire, and some scuffed, worn or ripped areas would eventually give out.
In this case, inflating your tire will not help. You just have to head over to Amazon and get brand new tires. Think about it.
Your bike deserves that much for serving you so long to have its tires worn for your sake.
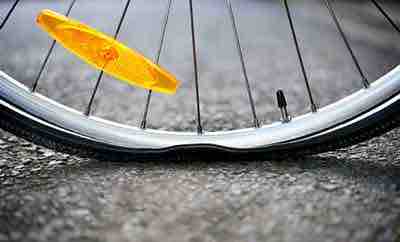
Your tire is slightly out of place
Have you ever ridden over a speed bump so first, the jerk impact almost throws you off balance? Well yeah, that happens to tires too.
Maybe it was a speed bump for you. Maybe it was a curb, or a sidewalk, or a bad road, either one your tire will shift slightly out of place.
It will be slightly separate from the rim and you may not notice it but with time the separation will lead to loss of air.
Sometimes apart from the force that will separate the tire from the rim, an object may be the cause of the separation.
This is not something you can easily fix. I will advise you to take it to your mechanic for a quick check and fix.
You may not even detect the problem that easily so it is good that you check your bike regularly and before setting out with it. See if they are all in alignment and if everything is in place.
The tires are over-pumped
You may think big over-pumped tires are good for your bike. Gives that look but it is a potential hazard. The pressure from the tires will affect the bike and even you the rider.
You will be higher off the ground. The tires may not be able to hold all the air and your weight and it can all lead to a blowout, a burst tire.
If you are riding when this happens you can get seriously hurt. Make sure your tires are pumped to the right size and that both tires are the same size.
How to keep the tires from going flat
There are a few tricks I know that will prevent you from changing your tires often:
Use talcum powder
This is good for tubed tires. Liberally dust talcum powder over the tire before replacing it.
This will ultimately prevent chafing and in turn wearing the tire. Hey if you can’t get talcum powder from a convenience store, try Amazon.
Give your tires some protection
Your tires could use some help to serve you better. What better than to give them some protection.
Rim strips prevent the tube from spoke or rim holes that can otherwise puncture it.
Tire liners are another tire protection. Fitting between the tire and the tube, its work is to create a layer that decreases the chances of a puncture.
Pretty cool right? Your tube becomes invincible!
Slimy goo
Not a very tidy or exciting prospect but it works. All you need is goo that is a bit liquefied and put it between the tire and the tube.
If there is a small puncture, the goo will block the hole. This however works if the hole is small enough.
What type of goo do you use? Try tire coral or tube sealant. Since most of the tire coral is homemade, please stick to the tube sealant.
Wow. And that’s a wrap. Today I am sure you have learned a life skill which is how to change your tire and indirectly how to take better care of your bicycle. Well till the next article, goodbye.