Maybe this is your first bike or you have just experienced your first flat tire and you don’t know how to fix it, what you will need a quick talk on patch glue.
Whether your bike is tubed or tubeless, your bike is prone to accidents that will cause deflation.
If it is a small puncture by a stick, a sharp stone, or whatever, there will be a hole.
In a repair kit, you will see a patch, either pre-glued (with adhesive on it) or with a tube of glue that you can use to patch the hole.
Now, what if you don’t have tube glue? The tube glue is mostly rubber cement that is safe to handle in the form of adhesive.
Sometimes it dries up, what will you do then? What if you run out of it? What if the one you have is not enough?
Here are some tire patch and tube glue substitutes that you should be aware of. They are easy to find, but more importantly, they perform well and can be used to repair and reinforce a tire patch.
Table of Contents
7 Bike tire patch glue substitutes for your use
Here are a few things you can use in place of patch glue:
- Gorilla glue
- Sealing or packaging tape
- Sealant
- Silicone or caulk glue
- Tire repair cement
- Rubber cement
- Homemade sealant
Gorilla glue

Gorilla glue is seen as one of the strongest puncture repair glue alternative on planet earth. The waterproof adhesive expands in a way that the polyurethane formula can work on any object or surface.
It should work quite well for your patch. Now you are advised to be very careful. Apply on the patch and then use the patch in the tube or tire.
If you put too much, because of how strong it is you may not be able to separate the tube from the tire. If your bike is tubeless, it may pick dirt on the way that won’t come off.
When you use the glue please let it dry completely before you set out with your bike. Gorilla glue comes in different sizes and will I say editions.
Some for home use, wood, some are clear, others for heavy-duty, one even comes with a brush preventing waste.
Sealing or packaging tape

They are very common, very popular, every household has one of these tucked in a drawer or box somewhere and I guess you never thought this was good enough for your top-of-the-line bike tire.
Well, dire times call for dire solutions so here we are. Now while just any tape, like duct tape, should do the job, I will recommend double-sided tape.
For your normal tape that has adhesive on one side, you will have to roll so that the sticky part touches the bare part, and then it can act as a double tape.
A good example is JARLINK Clear Packing Tape. If you don’t want to go through that stress, you can just go for EZlifego Double-Sided Tape.
It is a heavy-duty double-sided tape that is good for any surface including walls and objects. When you cut the size you want, one side will be on the patch and the other over the hole.
If you are not reassured, you can then put one over the patch and the other side will touch the tire, securing it.
Your normal black tape is also ideal since it doesn’t come off easily and is also heavy-duty. Get it on ONLINE today.
Sealant

This is not a DIY mix that you throw together. Though it is mostly for tubeless tires, they are as effective as tubed tires.
It is in fact recommended because it dries quickly, is durable, and is lightweight.
It is easy to use and is good for even car tires. I will recommend Slime first. They do some heavy-duty work and come in different sizes.
Another sealant is KOM Cycling Tubeless Tire Sealant. Every sealant can boast of being lightweight but not having a viscosity lower than KOM.
This makes it dry quicker and ideal because of how thick it is.
Lastly, I will introduce you to JOE’S NO FLATS Elite Racer’s Sealant. It is not as popular as Slime but it is effective.
Manufactured with micro sealing particles, it will spread around the tube or tire to seal all holes that will never reopen.
Silicone glue

While many are against anything that did not come from a repair kit for their tires, you can’t argue with silicone.
There are different uses of silicone and the type you will need is the type you use for gluing things in wet areas.
A few drops and two patches should work. I say two because it is necessary. One in the tube and one in the tire.
Silicone won’t prevent another puncture, it is just glue. So you will need that extra protection of another patch that silicone can’t offer.
Get on online, J-B Weld All-Purpose RTV Silicone Sealant is recommended. You can also try BAZIC Silicone Glue.
Caulk glue is another option and it is very similar to silicone. The difference between the both is that while silicone is elastic, caulk shrinks and is rigid when applied.
It is waterproof and majorly used in repairs. Well, you will have to repair that tube with a bit of caulk glue, then apply your patch. Caulk guns are also available. Anything you should be worried about?
Nothing really, it is just best for small holes. Get your caulk glue on amazon. Acoustical Caulk is one of my favorites, give it a try.
Another option is Loctite Polyseamseal Tub & Tile Adhesive Caulk. This waterproof adhesive will provide a waterproof seal that will hold your patch to your tube and won’t be damaged by water.
Tire repair cement

Have you ever wondered what patch glue is made from? No, it is not just regular glue. It has a bit of cement in it. This makes tire repair cement a suitable substitute.
Tire repair cement will not damage your tube or tire because it is made specifically for tires. You can use it on the tire, the tube, and the patch.
The cement in it is a mixture of rubber and solvent. When applied that solvent evaporates leaving the rubber, which has become a gooey adhesive to bind things permanently. Note that it doesn’t dry within seconds.
As a matter of fact, you will have to apply and give it at least 5 minutes before you apply the patch. The time you have to wait is a small price to pay for the permanent solution.
You must also remember to close it tightly or it will dry up and leave it useless. That is one reason many people are not into cement.
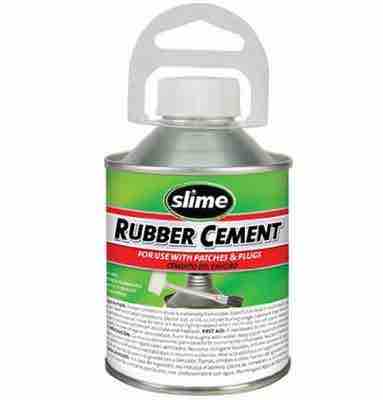
For recommendations, Slime 1050 Rubber Cement is a good choice. You can also try XTRA SEAL Tire Repair Cement. Be careful though, this one is flammable.
Rubber cement is also good, works just as well. Just be sure to read the instructions before applying it so you know how to handle and what you do.
Homemade sealant
Finally! Something homemade. So let’s imagine it is an emergency, you get on your bike and you notice that something is wrong but you need to go.
You don’t have the time to order a package from Amazon and wait for a week or two. What if you are in another country? When will that arrive?
No, you need something effective and you need it fast. Here is something you can throw together: homemade sealant. You will need only two things.
The first is water-based glue. Anything from an arts and craft box should help just as long as it binds things together.
Now I don’t know too many water-based glues but I know Top Bond and it has a bit of moisture in it. If you can lay your hands on it, get it.
The second thing is rubber dust. If you don’t have that, you can try glitter. If by chance you have sawdust, that will work well too.
The process is simple. Mix the sawdust or glitter with the glue. If the glue you have is too thick, add a bit of water to it.
Now you will notice that after mixing the two together, it will be thick and should on its own be able to patch the hole.
The reason we will still use the patch is that the water-based glue firm your arts and crafts box is not manufactured for heavy work but paper and cardboard.
Now you just have to smear your new sealant on the patch, give it about 2 to 3 minutes to dry before you use it to cover the hole. And done!
Homemade glue
We have made our sealant, let’s try glue. If you can’t buy super glue, you make yours. You will need three things: glycerin, gum Arabic, and water.
To store the glue we will be making, you will need an airtight container.
Glycerin is a food preservative, gum Arabic is a food ingredient and water is the solvent we will be using.
In the airtight container, add 1 tablespoon of glycerin, 3 tablespoons of gum Arabic, and half a teaspoon of water.
Mix thoroughly and keep it sealed shut. Apply on the patch and see how well it will work. This should be for about 6 months to a year.
Flour and water paste
As a pastime, I bake. That means I spend a lot of time around flour to know how sticky it can be when mixed with water.
If you leave it for a few hours, it will be almost impossible to get off. This makes it a potential source of frustration and a great adhesive.
The quantity of water or flour you will use depends on how much you want to keep but there are a few tips you need to know
- First start with the flour, let there be a little in the container you are mixing it with
- Then slowly add your water while stirring
- You can stop adding water when it is nice and thick
- If you, however, put too much water, you can add more flour
- Be sure to stir it well unless your flour will just sit at the bottom in clumps. And it is ready
- The downside to this is that it is not as durable as every other method above
Conclusion
Okay, that’s it for today. I hope this article was more than helpful, covering all possible solutions that are easy to reach and effective.
Thank you for reading. If you have any questions or comments please drop them in the comment section below and I will see you in the next article.
Related topics:
- Can You Patch A Tire After Using Fix-a-Flat
- Best Glue for Tire Plugs
- Bike Tire Goes Flat Overnight
- How Far Can You Drive on a Car Tire with a Slow Leak
- Why Do My Bike Tires Keep Popping